
Slow Tyre Leak from the Rim: Causes, Diagnosis & Fix
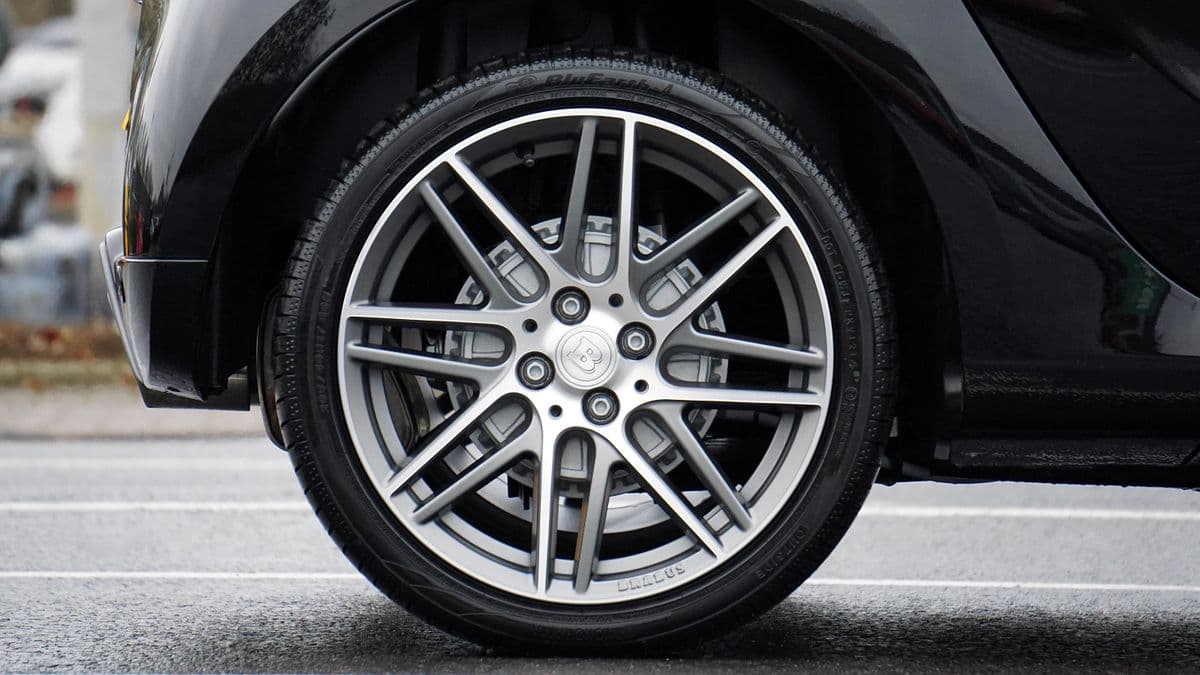
If you top up one tyre every week or two and can never find a nail or a screw in it, the leak probably is not coming from the tread at all. A slow tyre leak from the rim is one of the most common problems we see at Speedline Mags in Parow, and it is also one of the most misdiagnosed. Drivers replace perfectly good tyres, chase phantom punctures, and keep a compressor in the boot for months — when the real culprit is the wheel itself.
The good news is that a rim leak is almost always repairable, and it is far cheaper than a new tyre or a new wheel. In this guide we explain exactly why alloy wheels start leaking at the rim, how to confirm that is where your air is going, and what a proper fix involves.
Why Air Leaks from the Rim, Not the Tyre
Your tyre does not seal against the road — it seals against the wheel. The inner edges of the tyre, called the beads, press against two machined ledges on the rim known as the bead seats. When that contact is clean and smooth, the join is airtight. When anything gets between the bead and the bead seat, air escapes slowly and steadily.
On modern cars there is no inner tube, so the bead seat is the only thing holding your air in. Anything that disturbs that surface — corrosion, a dent, a hairline crack — becomes a leak path. Because the gap is tiny, the leak is slow: 3 to 10 kPa a week rather than a sudden flat. That slow, nagging pressure loss is the signature of a rim leak.
The Main Causes of a Rim Leak
1. Bead seat corrosion (by far the most common). Aluminium alloy oxidises where the protective clear coat has worn away or been chipped. On the hidden bead seat, a crusty white or grey layer of aluminium oxide builds up under the tyre bead and holds it slightly off the metal. This is the number one cause of slow leaks on cars older than about five years, and it is closely linked to general wheel corrosion. Cape Town's coastal salt air accelerates it noticeably.
2. Pothole and kerb damage. A hard pothole strike can put a small flat spot or dent right on the bead seat lip. Even if the wheel still looks round, that flattened section stops the bead sealing. Given the state of roads like Voortrekker Road and stretches of the N1, pothole damage to rims is a leading cause of leaks in the Northern Suburbs.
3. A bent or buckled rim. A wheel that is no longer perfectly round or true will let the bead lift in one spot as it rotates. If your leak is worse when the car sits with a particular part of the wheel at the bottom, suspect a bent rim that needs straightening.
4. Hairline cracks. A crack across the bead seat or the inner barrel of the wheel can weep air continuously. Cracks are serious — they are a structural issue, not just a sealing one, and they need to be assessed before the car is driven hard.
5. Damaged valve or valve seat. Not strictly the rim, but worth ruling out. Rubber valve stems perish and the metal clamp-in valves used on TPMS wheels have a rubber grommet that hardens with age. A perished valve mimics a rim leak exactly.
How to Confirm the Leak Is Coming from the Rim
Before you spend money, prove where the air is going. You can do most of this yourself in a driveway in Bellville or Durbanville with a spray bottle.
The Soapy Water Test
Mix a good squirt of dishwashing liquid into a spray bottle of water. With the tyre inflated to its correct pressure:
- Spray the valve stem first. Bubbles here mean the valve, not the rim.
- Spray right around the tyre bead where the rubber meets the wheel — both the outer (street) side and, if you can reach it, the inner side.
- Spray across the face and spokes of the wheel in case of a crack.
- Watch for slow-growing bubbles or a small foam dome. A rim leak often needs 20 to 30 seconds to show, so be patient and look closely along the bead line.
If bubbles appear steadily along the bead, you have confirmed a bead seat leak. If nothing shows on the outer bead, the leak is likely on the inner bead seat — the side facing the brakes — which is the most common hiding place because you cannot see or spray it easily. That is when it is time for a workshop.
The Overnight Pressure Check
Set all four tyres to the same pressure, note the readings, and check again after 24 hours with the car unused. A single tyre that consistently drops while the others hold is your leaker. Cross-reference the drop with the correct pressure for your car — our tyre and wheel safety guide covers how to find your placard pressure. Do not chase small differences caused by temperature; a cold morning in the Cape winter can shift every tyre by a few kPa at once.
How Speedline Mags Fixes a Rim Leak
A proper rim leak repair is not a squirt of sealant slime down the valve. Tyre sealant is a temporary get-you-home measure that gums up your TPMS sensor and hides the real problem. Here is what a lasting repair actually involves.
Step 1: Break the Bead and Inspect
We deflate the tyre and break both beads off the rim so the bead seats are fully exposed. This is the only way to see the real condition of the sealing surface. Nine times out of ten the inner bead seat tells the story straight away — a ring of white oxide or a bright dent where a pothole struck.
Step 2: Clean and Restore the Bead Seat
The corroded or contaminated bead seat is cleaned back to sound metal. We remove the oxide layer, smooth any minor pitting, and check that the sealing ledge is flat and continuous. On a wheel where the corrosion is only skin deep, this cleaning plus a thin, tyre-safe sealing compound on the bead seat is all that is needed to make it airtight again.
Step 3: Address Any Structural Damage
If the inspection reveals more than surface corrosion, the repair scales up:
- A flat spot or dent on the bead seat is corrected with our rim straightening process, bringing the seat back to a true circle.
- A crack is assessed and, where it is safe and within the repairable zone, welded and re-machined. We never seal over a crack and send you on your way — cracks are checked properly first.
- Heavy overall corrosion is often best solved with a full refurbishment, stripping and re-coating the whole wheel so the bead seat is protected for years, similar to the process in our powder coating guide.
Step 4: Refit, Reseal and Balance
The tyre goes back on with fresh sealing on the bead, a new valve where needed, and correct inflation. Every wheel that comes off the car for a leak repair should be re-balanced before it goes back on — disturbing the tyre changes the balance slightly. Our wheel balancing after rim repair guide explains why this final step matters for a smooth, vibration-free drive.
What It Costs in Cape Town
Pricing depends entirely on what the inspection finds:
- Bead seat clean and reseal (the most common fix): a modest workshop charge, typically in the low hundreds of rand per wheel, including refit and balance.
- Straightening a dented bead seat: mid-range, depending on severity.
- Crack repair or full refurbishment: more involved — see our rim repair cost and process guide for realistic figures.
In almost every case, fixing the rim is a fraction of the cost of a new alloy wheel, which can run into several thousand rand for common cars like a VW Polo, Toyota Hilux or BMW 3 Series — and far more for a diamond-cut OEM wheel.
Can You Keep Driving with a Slow Rim Leak?
For a short period, yes — provided you check and maintain the correct pressure regularly. But do not treat it as normal. A tyre that spends time under-inflated runs hotter, wears its shoulders unevenly, and handles worse in an emergency stop. If the leak is caused by a crack rather than corrosion, continuing to drive is genuinely risky and the wheel should be inspected without delay. When in doubt, get it looked at.
Preventing the Next Rim Leak
You cannot fill in every pothole on the way to work, but you can slow down the corrosion that causes most leaks:
- Keep your wheels clean. Salt, brake dust and road grime trapped against the rim speed up oxidation. Use a gentle, acid-free wheel cleaner rather than harsh acidic products.
- Fix chips early. Once the clear coat is breached, corrosion starts. Touch up or refinish damaged wheels before the rot spreads to the bead seat.
- Mind the potholes. Easier said than done in Cape Town, but our guide to protecting your wheels from pothole damage has practical tips that genuinely help.
- Ask for bead seat treatment at tyre-change time. When you fit new tyres, ask the fitter to clean and protect the bead seats. It is the cheapest insurance against future leaks.
Get Your Rim Leak Sorted at Speedline Mags
If you are tired of topping up the same tyre every week, bring the car to Speedline Mags in Parow. We are a short drive from Bellville, Goodwood, Durbanville and the rest of the Northern Suburbs, and we diagnose rim leaks properly — breaking the bead, finding the real cause, and fixing it so it stays fixed. If you would rather not lift a wheel yourself, we can also help through our wheel repair service across the Northern Suburbs.
Stop feeding the compressor. Contact Speedline Mags today for an honest assessment and a lasting repair — and get back to driving on tyres that hold their air.